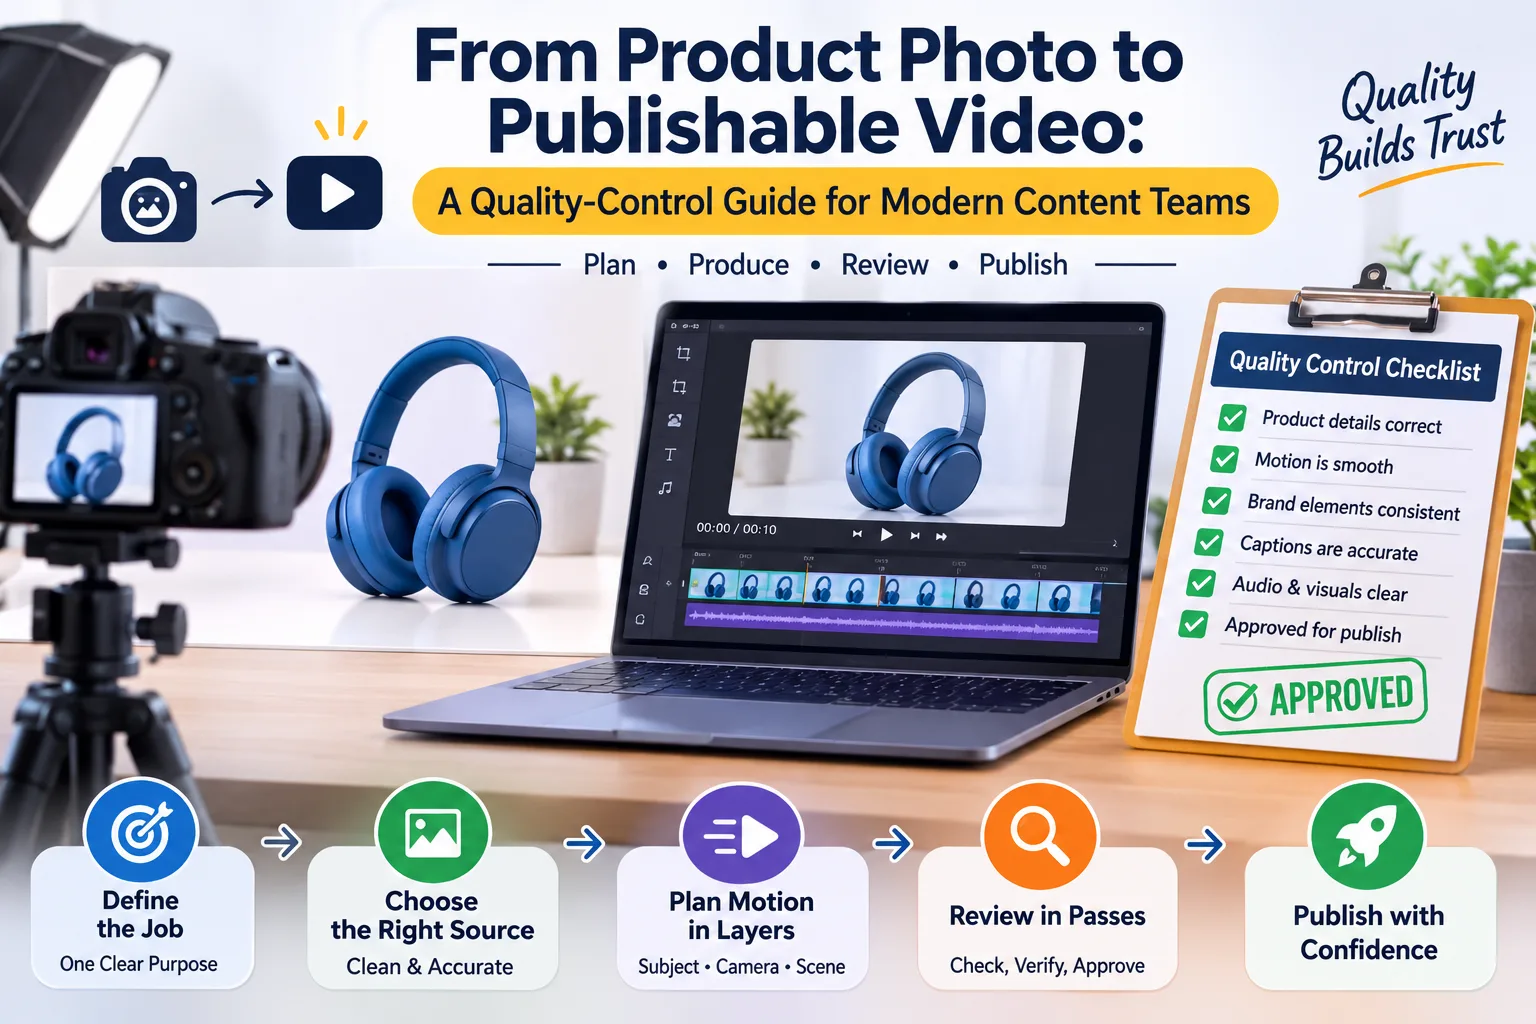
Why visual efficiency needs quality control
Modern content teams are under pressure to produce product videos for social feeds, marketplaces, landing pages, email campaigns and support libraries. The fastest response is often to generate more variants, but volume without control creates a different problem. Product details drift, brand elements become inconsistent and reviewers spend more time correcting outputs than creating useful stories.
A stronger approach combines efficient production with a clear quality-control path. The process begins before any tool is opened and continues after the file appears finished. Teams that define the message, prepare the source, direct motion precisely and review against fixed criteria can move quickly without sacrificing trust.
Define the job of the video
Every clip should answer one question. Is it showing scale, explaining a feature, demonstrating a use case or helping a customer imagine the product in context? A single purpose keeps the visual sequence focused. It also makes approval more objective because reviewers can ask whether the video performs its intended job.
Write a one-sentence brief that includes the audience, the message and the desired action. For example: “Help first-time buyers understand how the compact lamp fits on a small desk, then invite them to view dimensions.” This is more actionable than a request to make the product look premium or viral.
List the facts that must remain unchanged. These may include colour, proportions, packaging text, safety marks, buttons and included accessories. When an output alters one of these facts, it is not simply a creative variation; it is inaccurate product communication.
Choose and prepare the source image
Source quality has a large influence on animation quality. Select a photograph with a sharp focal subject, realistic lighting, clean edges and enough negative space for the planned movement. Avoid starting with compressed images, heavy filters or reflections that already distort the product.
Remove temporary promotional text before animation and add final typography later in the editing process. This reduces the chance of letters bending or changing between frames. Keep an untouched copy of the original beside the working file so reviewers can compare details without searching through a large asset library.
Teams can use a tool to turn product photos into video when a still already communicates the product clearly but needs motion for a campaign format. The tool should support the brief, not replace it. A weak source or vague instruction usually produces more variations to review, not a better result.
Write motion directions in layers
Useful direction separates three kinds of movement. First, describe what the subject does: a lid opens, fabric moves gently or a light turns on. Second, describe the camera: a slow push-in, a small left-to-right pan or a fixed viewpoint. Third, describe the environment: steam rises, curtains move or background light shifts.
Keeping these layers separate helps diagnose failure. If the product remains accurate but the scene feels unstable, reduce camera or environmental movement. If the camera is smooth but the product deforms, simplify subject motion or choose a source image with clearer geometry.
Avoid stacking many actions into a short clip. One clear movement often looks more convincing than several competing effects. Create two or three purposeful variants rather than a large random batch. Label them with the source file, motion choice and brief so the team can learn from the outcome.
Review in passes, not all at once
A structured review is faster than asking whether the video “looks good.” In the first pass, ignore style and check product truth: proportions, labels, colour, materials and component placement. In the second pass, check continuity: edges, shadows, reflections and objects that enter or leave the scene. In the third pass, evaluate communication: does the opening establish the subject, does the motion reveal useful information and is the final frame readable?
Pause on the first frame, the last frame and the moment of greatest motion. These points often expose warping that is easy to miss at normal speed. Watch once on a phone and once on a larger screen. A small display reveals whether the focal point is clear, while a large display makes fine defects easier to see.
Captions require a separate check. Confirm spelling, claims, units and display time. Use enough contrast for bright and dark scenes, and leave safe margins for platform interfaces. Because many viewers begin with sound off, the core message should remain understandable without audio.
Handle people and identity edits responsibly
People can make a product story more relatable, but identity-altering effects introduce legal and ethical risk. When a campaign needs an alternative presenter or character, an AI video face swap tool may support the approved concept. Use only footage and likenesses for which the team has permission, and preserve the original files and consent records.
Technical review should compare the edited version with the source at matching moments. Inspect hairlines, jaw movement, eye direction, skin tone and transitions when the subject turns or becomes partially obscured. Stable lighting and a clearly visible face generally make evaluation easier, but a seamless result is not automatically an appropriate one.
Do not use identity edits to fabricate testimonials, imitate a public figure or imply that someone endorsed a product. If synthetic alteration could affect how a reasonable viewer interprets the scene, provide context through the creative treatment or disclosure.
Build an approval path that scales
Define who can approve factual product details, brand presentation and rights. These roles may belong to the same person in a small business, but the questions should remain distinct. A marketing lead might approve the message while a product specialist confirms that the demonstration is accurate.
Use a short checklist with clear outcomes: approve, revise or reject. Revision notes should identify the defect and the desired change. “Keep the label stable during the camera move” is more useful than “make it better.” Store the approved version with its source asset, brief, prompt or edit notes, reviewer and publication date.
Measure learning, not only reach
Views and clicks show audience response, but production data improves the next cycle. Track how long approval took, which defects caused rejection, how many variants were needed and which source-image qualities correlated with success. If reflections repeatedly create instability, the team can adjust photography guidelines instead of fixing the same problem in post-production.
Review the library periodically. Retire videos with outdated packaging, claims or prices. Preserve the most useful briefs and motion patterns as examples for future contributors. Over time, the organisation builds a practical visual playbook based on evidence rather than taste alone.
A disciplined process protects creativity
Quality control is sometimes treated as a brake on creative work, but a predictable review system does the opposite. It tells creators which facts are fixed and where experimentation is welcome. It reduces vague feedback, prevents avoidable mistakes and gives teams confidence to reuse successful methods.
The goal is not flawless novelty in every frame. It is accurate, useful and authorised communication delivered at a sustainable pace. When content teams connect a clear brief to deliberate motion, multi-pass review and a lightweight audit trail, one strong product photograph can become a reliable campaign asset without weakening customer trust.