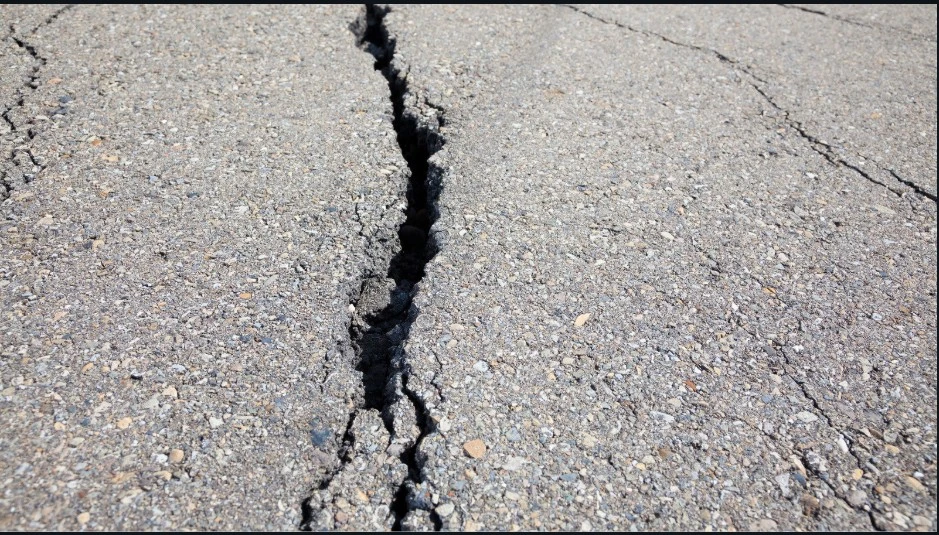
Concrete driveways are known for their durability, but wear and tear can take a toll over time, leaving unsightly cracks. Whether it's due to weather, heavy vehicles, or natural settling, a cracked driveway doesn’t just look bad—it can also lead to bigger, more costly issues if left untreated. If you're looking for a cost-effective and simple solution to restore your driveway’s condition, you’ve come to the right place. In this guide, we’ll walk you through the entire process of repairing your cracked driveway with easy-to-follow steps that can save you both time and money.
Why Do Concrete Driveways Crack?
Understanding why your driveway has cracked is crucial before jumping into repairs. Concrete cracks for a variety of reasons, including:
- Temperature fluctuations: Concrete expands and contracts with the changing seasons.
- Settling foundation: If the ground underneath your driveway is unstable or uneven, it can cause the concrete to shift and crack.
- Heavy traffic: Large vehicles or frequent traffic can put undue pressure on the concrete, causing cracks.
- Water damage: Standing water from poor drainage can seep into cracks, freeze in winter, and expand, worsening the damage.
What You’ll Need for Concrete Repair
Before starting the repair process, make sure you have the right materials on hand. Here’s a list of essential tools and supplies for fixing cracked concrete:
- Concrete patching compound or filler
- Concrete cleaner or degreaser
- Wire brush or broom
- Trowel or putty knife
- Caulk gun (if using a crack filler tube)
- Safety gloves and goggles
- Hose or pressure washer
With these tools and materials, you’ll be well-equipped to tackle the repair project!
Step-by-Step Guide to Repairing Your Concrete Driveway
Now that you’ve gathered your supplies, it’s time to get started. Let’s dive into the step-by-step guide for repairing your cracked driveway.
Step 1: Clean the Cracks and the Driveway
The first thing you need to do is thoroughly clean both the cracks and the surface of your driveway. Any debris, dirt, or oils can interfere with the bonding of the patching material. You can use a wire brush or broom to remove loose debris from the cracks. Afterward, use a concrete cleaner or degreaser to scrub the driveway surface.
If the dirt is stubborn, consider using a pressure washer to get rid of tough grime. Let the surface dry completely before proceeding.
Step 2: Prepare the Cracks for Repair
Once the driveway is clean, it’s time to prepare the cracks. Using a wire brush or even a hammer and chisel, gently widen the cracks a little to ensure the filler has a better grip. This will allow the patching compound to adhere more effectively.
Step 3: Choose the Right Repair Material
Choosing the right material for your driveway repair is important for achieving lasting results. There are several products available:
- Concrete Crack Filler: Ideal for narrow, hairline cracks.
- Concrete Patching Compound: Best for filling larger cracks or holes in the driveway.
- Concrete Resurfacer: If your driveway has widespread damage, this can be used to apply a fresh layer over the entire surface.
For small cracks, crack filler in a tube or bottle will suffice, but for larger damage, a patching compound is recommended.
Step 4: Apply the Concrete Patch
For smaller cracks, use a caulk gun to apply the crack filler directly into the crack. If you are dealing with larger cracks, apply the concrete patching compound using a trowel or putty knife. Press the compound firmly into the crack and smooth it out so that it’s level with the rest of the surface.
Be sure to follow the manufacturer's instructions on the product label, as different materials may have varying application methods.
Step 5: Smooth and Level the Surface
After applying the patching material, use a trowel or putty knife to smooth and level the surface. This will help the repaired area blend seamlessly with the surrounding driveway.
Make sure the edges are well-defined and that no excess compound remains on the surface.
Step 6: Allow the Patch to Dry
Patience is key when it comes to allowing the patch to cure. Drying times vary depending on the product you use and the weather conditions, but typically, you’ll need to let the repair dry for at least 24 to 48 hours. During this time, avoid any traffic or exposure to water to ensure the patch has fully set.
Step 7: Seal the Driveway
To help protect your driveway from future damage, consider applying a concrete sealer after the patch has dried. Sealing the surface helps prevent water infiltration and can extend the lifespan of your driveway.
Preventing Future Cracks
While concrete repairs are necessary from time to time, there are steps you can take to prevent cracks from reappearing:
- Proper Drainage: Ensure your driveway slopes properly to allow water to drain away. Pooling water is a common cause of cracks.
- Seal Regularly: Apply a fresh coat of concrete sealer every couple of years to protect the surface from moisture and UV damage.
- Repair Small Cracks Early: Address cracks as soon as they appear to prevent them from worsening.
- Control Heavy Loads: Avoid parking heavy vehicles in one spot for extended periods, which can put excess pressure on the driveway.
Why DIY Concrete Driveway Repair Is a Good Idea
Repairing your driveway yourself offers several benefits:
- Cost savings: Hiring a professional can be expensive, but DIY repairs are affordable and easy.
- Time efficiency: Most repairs can be done in a few hours, allowing you to avoid long delays.
- Satisfaction: Completing the project yourself gives you a sense of accomplishment, and you'll have a driveway that looks like new.
Common Mistakes to Avoid
While DIY repairs are doable, there are a few common mistakes to watch out for:
- Not cleaning the surface thoroughly: Any dirt or debris left behind will prevent the patching compound from adhering properly.
- Using the wrong materials: Make sure you’re using the right patching material for the type of crack you’re repairing.
- Skipping sealing: Sealing your driveway is an important step that helps extend the life of your repair and prevent future damage.
How to Know When It’s Time to Call a Professional
While DIY concrete repairs are often successful, some issues might be beyond your capability. Consider calling a professional if:
- The cracks are widespread and deep.
- Your driveway has significant structural damage.
- You’re unsure about the materials to use or the application process.
A professional can provide a more durable solution and ensure that the work is done correctly.
Conclusion
Repairing a cracked driveway might seem like a daunting task, but with the right tools and know-how, it’s entirely achievable. By following the steps in this guide, you can fix your driveway yourself and save money while restoring its appearance and functionality. Regular maintenance and timely repairs will keep your driveway looking great for years to come, and you’ll be able to enjoy a smooth, crack-free surface every time you drive on it. If you need professional assistance, visit Sioux Falls Concrete Contractor for expert driveway repair services. So roll up your sleeves, gather your materials, and get started—your driveway will thank you!